


Bust Common Myths About Java Programming
Loading
Tensile Strength and Capacity Control of the W-Shape Sections According to AISC 360-16
Estados de Vigas de Concreto
Loading
Concrete Cylinder Strength Vs Cube Strength
Loading
Earthquake Design Action Calculation
Sıvılaşma Verileri Tablosu
EM Wave Propagation Calculator
Loading
Concrete Column Designer to AS3600
section properties with units
Forward Kinematics of Robotic Arm with 6 Degrees of Freedom
İKSA YAPILARI PROJELENDİRME HİZMET BEDELİ (2024)
GEOTEKNİK RAPOR (EK-B) ASGARİ HİZMET BEDELİ (2024)
ZEMİN İYİLEŞTİRME/DERİN TEMEL PROJELENDİRME ASGARİ HİZMET BEDELİ (2024) (İMO)
🚀
Projectile motion
Loading
Dezi et. al (2010)
🤾
Projectile motion
Have you ever been in a meeting with an architect, and they’ve asked you if they can extend a beam here or remove a column there? What grid spacing will and won’t work, or how big does the core really need to be?
Well, before you spin up a new Etabs model and spend 3 hours trying to answer that question, there’s a better and faster way to provide some high-level advice on the spot: by using rules of thumb!
While rules of thumb aren’t always applicable and should only be used as a guide and approximation, we thought it’d be helpful to list out the most essential rules in an article for your reference! Enoy!
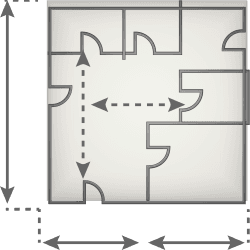
Framing
1) Space columns using a primary-to-secondary beam length ratio of 3:4
As a starting point for laying out a grid, a general rule for positioning columns and orientating beams is to follow a primary-to-secondary-beam ratio of 3:4.
Using this ratio, standard grids might be 6m (~20ft) column spacing in the primary direction and 8m (~26ft) in the secondary.
The logic for this is that primary members typically take more load and work harder than secondary members. So it’s advantageous to reduce their effective lengths. Primary members will typically be far larger than secondaries, so positioning them in this way reduces material usage regarding section sizes and connection heft.
Primary spacing
:6.00m
Secondary spacing
:8.00m
2) Cantilever to back-span ratio of 3:1
When working with cantilevers in beams with back spans, the ratio of the back span length to the cantilever length should generally be 3:1. So a beam with a span of 6 m (~20ft) will become more efficient when introducing a 2m (~7ft) cantilever at one end.
Beam back-span
:6.00m
Cantilever length
:2.00m3) Introduce thermal expansion and contraction joints every 150m (~500ft) each way
Using simulation software, the exact spacing and position of expansion joints can and should be determined for specific materials, conditions and structural layouts.
However, ensuring expansion joints at every 150m in both directions of a structure will be in the ballpark of what's required.
Using this rule of thumb and applying it to your drawings or reports and, therefore, in project costings will save you a headache down the line!
4) Typically, steel structures will be deflection governed
In most cases, steel structures will be deflection-governed, so it's important to know you're deflection equations.
Here's a handy beam analysis and deflection tool to calculate deflection on the go!
Steel members
5) Span to Depth ratios for steel framing
6) Frequency estimation
Frequency can be estimated from the deflection at mid-span. The ideal frequency range is 4-8Hz. The shorter it is, the less stiff the structure is and the more likely it is that an occupant may experience vibration.
Deflection
:25.00mm
Frequency
:3.60Hz
7) In most cases, continuous members are preferable to simply supported members
This is because it not only can balance out moments, as per rule 2 above, but it also reduces your design’s susceptibility to vibration. Having continuous members allows more mass to be engaged under excitation and dampens vibrations.
Note that this assessment doesn't account for additional connection complexity and requirements. This aspect of your design must also be considered before coming to a conclusion.
8) Camber out a maximum of 80% of deadload
While cambering beam is a powerful tool for permanent load deflections, over-cambering is dangerous. It can lead to a beam element having a permanent 'hog' in it, and/or it can drive vibration issues.
This is because:
- Most designs overestimate dead load, so pre-cambering out 100% of dead load will mean over-cambering.
- Most analysis approaches don’t consider the real-world fixity of connections, which will also reduce deflection.
So limiting your cambering to 80% of total dead load deflection, reduces the risk of over-cambering.
9) Span to Depth ratios for composite beams
10) Composite structural steel self-weight ~70-75% of a non-composite steel structure
Yup, this is the saving you'll see in tonnage due to using composite steel!
Keep in mind that there's always a trade-off. In this case, you'll need to allow for composite studs and decking trays in a composite design.
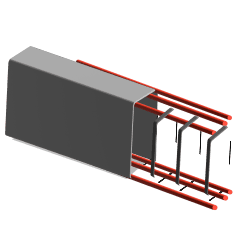
11) Small web penetration positioning
Locate smaller circular penetrations close to inflection points where V* is close to 0 and M* is low.
For typical simply supported beams, this will be at ⅓ points along the length of the member.
12) Locate penetrations in the middle of the beam where the shear is low, and include top and bottom plates for large openings
Place penetrations in the middle of the beam web, and make sure to include allowance for plates on the top and
The plates allow you to maintain moment capacity while taking advantage of lower shear demand in this part of the beam.
13) Space penetrations with a minimum of 2 x beam depth between each penetration.
This is to maintain integrity in the beam web, and allow transfer of shear as consistently as possible along the beam.
14) Column sizing
An approximation of how many levels a column can support when spaced at typical grids (as per rule 1).
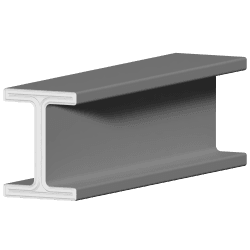
15) Deeper is cheaper
All other things being equal, a deeper wide-flange beam will be more economical than a shallower one.
Don't believe us? Compare your members performance using our beam capacity calculator for Australian sections!
16) Providing lateral restraint
For a fly brace or secondary member to provide lateral restraint to another member it connects to, it must have a capacity of at least the order of 2.5% of the maximum compressive force in the restrained member, in the transverse direction of the restrained member or compression flange.
See AS4100 cl 5.4.3 for more details on this one.
Check if your member has enough capacity to restrain using our beam capacity calculator for Australian sections!
17) Z-Purlins - Ducks always go uphill
When orientating Z-purlins, remember “ducks always go uphill”. In other words, the upper flange of the purlin should be pointing up the roof's slope.
Our detailed design guide has much more detailed information on how to design purlins and girts. Also, check out our handy purlins and girts calculator to check your designs.
Portal frames
18) Portal Frames - standard span-to-depth ratios
19) Apex haunches should run for about 1/8L of the beam span
At their maximum depth, the haunch should roughly match the depth of the rafter beam.
Beam span
:8.00
Haunch
:1.00
20) Roof pitch should be 2-3 Degrees depending on specific code and drainage requirements
You should also double-check the code, but if you need a number in a pinch, then you can estimate 2 to 3 degrees for a standard roof pitch.
Connections
21) Bolt sizes - M20 is king
You should always aim to use M20 bolts and 8.8/S grade and fit as a first pass.
This is because they're cheap and the most common, they also don't require any specialist equipment to install.
22) Connection Fin Plates
- For beams with depths less than 450mm (~17”), use 8mm (~0.3”) FIN plate.
- For beams with depths greater than 450mm (~17”), use 10mm (~0.9”) FIN plate.
Generally, you should match the web thickness of the connecting member.
23) Number of bolts to use for a regular connection
Beam depth
:300.00mm
Number of bolts
:3
But when you need a more detailed answer, you can use our bolt group capacity calculator for free!
24) Moment connections plate thickness
25) Aim for 6mm CFW welded connections
- For welded connections both on-site and when fabrication, 6mm fillet weld is preferred. This is because 6mm welds only require 1 pass of the welder, so fabricators and welders on site will love you for this! It’ll also save your client money.
- For a capacity estimate, 6mm CFW ~=1kN/mm
But when you need to do a more detailed calculation, you can use our weld group calculator for free!
26) Never weld high-strength (Grade 8.8 in Australia) bolts
If you need to weld captive bolts to a plate or member for a connection, they must be 4.6 grade or equivalent. This is because 8.8 bolts become brittle when heated during the welding process.
Learn more about high-strength structural steel here.
Estimating cost and weights
27) Weight of steel in a multi-storey building
The weight of steel (kg/m2) in a multi-storey building will be approximately 35 plus 1.6 times the number of storeys.
Storeys
:2.00
Weight of steel
:38.20ton
28) Weight of steel in a single-storey building
The mass of light industrial single-storey buildings that don't require cranes will typically be less than 25kg/m2.
29) Steel fitments additional tonnage allowance ~10%
For estimating purposes, allow:
- An additional 10% of light and medium steelwork (excluding purlins and girts) tonnage for connections, splices, column caps and base plates.
- Plus 1% for Grade 8.8 bolts or 0.5% for Grade 4.8 bolts.
Construction and erection
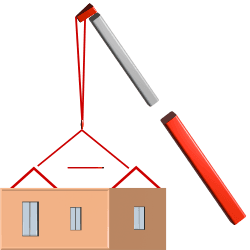
30) Keep the mass of any one member to less than 6 tons
To facilitate erection on typical projects, keep the mass of any one member to less than 6 tons. Anything above this requires heavier-duty cranes and temporary structures, which will be a pain on site if it's a one-off in particular.
31) The maximum length of a member that can fit on a standard truck is 12-19m
The maximum length of a member that can fit on a regular truck is 12-19m. For continuous members (e.g. columns), assume splices are required at every 12m.
32) Adjust the design of the first brace bay erected to use angles rather than rods
Rod/tie (tension only) brace bays don’t become stable until most of the structure is complete. Check out our detailed design guide on steel bracing design for more information.
So, for your first 'to-be-erected' brace bay (to be determined with the builder), design the bracing members as angles rather than rods.
While these sections will be heavier, your builder friends will thank you, as this ensures the bay is stable in the temporary condition rather than requiring temporary props. It'll also provide a stable platform for the builder to construct off, so they can save even more on temporary works.
CalcTree
More content like this
- Check out our library of detailed design guides for various structural elements
- Check out our library of engineering 'fundamentals' explainers and write-ups.
Have we missed one? Reach out and let us know at contact@calctree.com
References
- https://www.youtube.com/watch?v=Dz26PBnog4k
- https://www.youtube.com/watch?v=KWnBNf1INfs
- Collection of rules from our internal team of engineers.
Check out our library of engineering tools here!