


Bust Common Myths About Java Programming
Loading
Tensile Strength and Capacity Control of the W-Shape Sections According to AISC 360-16
Loading
Concrete Cylinder Strength Vs Cube Strength
Loading
Earthquake Design Action Calculation
EM Wave Propagation Calculator
İKSA YAPILARI PROJELENDİRME HİZMET BEDELİ (2024)
section properties with units
GEOTEKNİK RAPOR (EK-B) ASGARİ HİZMET BEDELİ (2024)
Forward Kinematics of Robotic Arm with 6 Degrees of Freedom
ZEMİN İYİLEŞTİRME/DERİN TEMEL PROJELENDİRME ASGARİ HİZMET BEDELİ (2024)
İKSA YAPILARI PROJELENDİRME HİZMET BEDELİ (2023)
Loading
Dezi et. al (2010)
🤾
Projectile motion
This design guide follows AS/NZS 4100:2020 Steel Structures and AS/NZS 1720:2010 Timber Structures.
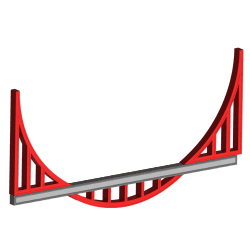
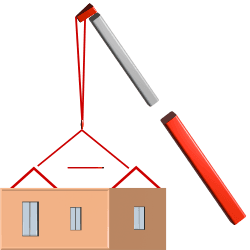
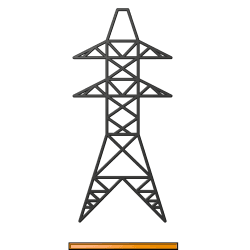
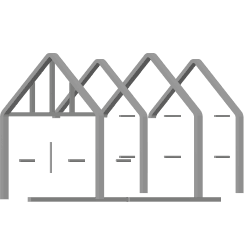
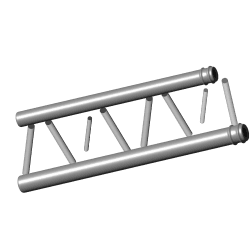
Step 1. Select an Appropriate Truss Type
To start, identify the loading conditions imposed on the structure. This could include:
- Dead loads
- Live loads
- Wind loads
- Seismic loads
- Temperature effects etc.
Select the appropriate truss based on the application and loading conditions. Check out some of the common truss types here. Depending on the intended application, trusses are generally made from timber or steel. Applications for truss roof design in residential construction usually involve timber.
An important rule of thumb used when sizing trusses is the span/height ratio. This ratio indicates the slenderness of the overall truss. Generally, for efficient structural performance the span/height ratio should be within the range 10-15.
Step 2. Calculate Design Loads and Design Actions
Design Loads:
Calculate the design loads in accordance with AS/NZS 1170.1 and AS/NZS 1170.2 and use AS/NZS 1170.0 to determine your combination of actions (ULS and SLS).
For roof truss structures you will need to consider roof covering (e.g. tiles, metal sheeting) and the ceiling (e.g. plasterboard, suspended ceiling systems) for your superimposed dead load.
Check out our Design Guide: Structural Load Calculations for more information.
Design Actions:
Then, determine the resulting forces in the truss members. The two commonly used methods for truss analysis for statically determinant trusses are:
- Method of Joints - considers the equilibrium of a joint
- Method of Sections - considers the equilibrium of a section
Statically indeterminant structures would require solving by:
- Force method - redundant forces are treated as unknowns
- Displacement method - displacements are treated as unknowns
- Finite Element Analysis (FEA) - by hand or using a computer software (e.g. Microstran, Stand7 and SpaceGass)
Refer to Truss Analysis for more details and worked examples for statically determinant trusses.
Step 3. Select Truss Member Section
Select sections for the first design reiteration of the truss members. Here are some relevant catalogues to get you started:
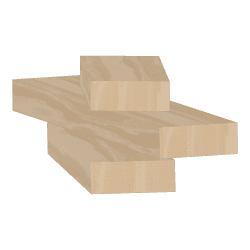
- Timber Sections: Wood Products Victoria: Structural Timber Product Guide
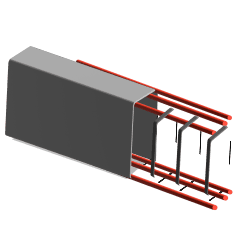
Steel trusses are typically made from hollow sections and/or angle sections for the diagonal members. Timber trusses are typically made from square or rectangular sections.
Step 4. Design the Truss Members
Since we know what design actions each of our truss members see, we know which we need to check for axial tension and which we need to check for axial compression.
For timber design, AS 1720.1:2010:
- Tension members: Clause 4.3
- Compression members: Clause 2.4
Check out our Wood Column Design Calculator to AS 1720.1:2010!
For steel design, AS 4100:2020:
- Tension members: Clause 7.2
- Compression members: Clause 6.3
Refer to Steps for Designing Steel Bracing to Australian Standards for the full details of steel design.
Check out our Standard Steel Section Designer to AS4100!
💡More on Timber Design
Timber is strongest in compression parallel to the grain direction, compared to than tension. Its properties in the perpendicular to the grain direction are significantly lower.
Step 5. Design Connections
Truss connections at nodes/joints are usually plated bolt connections or plated nailed connections. The requirements for connections are outlined in:
- AS 1720.1:2010: Section 4 - Design Capacity of Joints in Timber Structures
- AS 4100:2020: Sections 9 - Connections
Check out our Bolt Group Calculator to AS 4100!
💡Let's compare bolts vs nails for connections
Diameter of fastener
Nail connections
Smaller, so more flexible
Bolt connections
Larger, so more rigid
Number of fasteners
Many, so low load per unit area
Fewer, so high load per unit area
Area of fasteners
Nailed over larger area, so less stress concentration
Bolted over a smaller area, so high stress concentration
Impact on timber
Nails part timber fibres, there is no discontinuity within the fibres
Holes are drilled for the bolts, can damage wood fibres which has implications on the strength
💡Let's talk about splices
In practice, the top chord and bottom chord may not be connected at the nodes!
For example, wood beams are usually manufactured with fixed dimensions. So, the top and bottom chords usually need longer wood beams. It is best practise to pass the chords through the nodes and splice the members somewhere in the middle third of the member.
CalcTree