


Bust Common Myths About Java Programming
Loading
Tensile Strength and Capacity Control of the W-Shape Sections According to AISC 360-16
Estados de Vigas de Concreto
Loading
Concrete Cylinder Strength Vs Cube Strength
Loading
Earthquake Design Action Calculation
Sıvılaşma Verileri Tablosu
Loading
Concrete Column Designer to AS3600
EM Wave Propagation Calculator
section properties with units
Forward Kinematics of Robotic Arm with 6 Degrees of Freedom
İKSA YAPILARI PROJELENDİRME HİZMET BEDELİ (2024)
GEOTEKNİK RAPOR (EK-B) ASGARİ HİZMET BEDELİ (2024)
ZEMİN İYİLEŞTİRME/DERİN TEMEL PROJELENDİRME ASGARİ HİZMET BEDELİ (2024) (İMO)
🚀
Projectile motion
Loading
Dezi et. al (2010)
🤾
Projectile motion
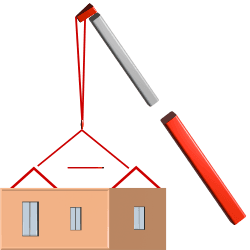
Purlins and girts are horizontal beams used for structural support in buildings. Purlins are a roof element and provide support for the weight of the roof sheeting while girts are a wall element and provide support for wall cladding.
Purlins and girts are a very common building element, so it is worth knowing how to design them. Look no further, we’ve got the guide for you! Below we'll answer a few key questions;
- What is a purlin in construction?
- What is a girt? And,
- What are purlins used for?
📟 We also have an accompanying calculator here.
What are purlins and girts?
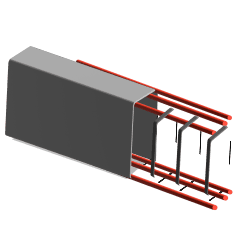
Purlins and girts are structural members in roofs and walls that support loads from sheathing and cladding and are themselves supported by rafters, trusses, or building walls. Purlins and girts can be made from timber or steel. As a rule of thumb, purlins are frequently proportioned for a depth-to-length ratio of 1/32. Dead, live, snow, and wind loads should be calculated by the designer and checked against the bending, shear, torsion, buckling, and deflection capacity of the girt or purlin by relevant design codes.
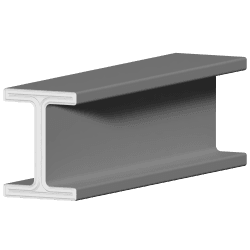
Steel purlin sections are namely C or Z sections. Steels are typically hot or cold-rolled. Hot rolling involves rolling steel at high temperatures to allow easy shaping and forming. Compared with hot-rolled sections of the same thickness, cold-rolled purlins tend to be lighter, stronger, and easier to assemble.
Purlin Essentials
Steps to roof purlin design
1. Determine spacing and span direction
The following factors should be considered when determining roof purlin spacing:
- The general rule of thumb: The maximum distance between steel purlins should be about 1200 mm. In residential buildings, the typical distance is about 600 to 800 mm.
- The maximum load from roof sheathing: as a rough guide, the maximum distance between purlins should be no more than 1200 mm with a 7 mm thick sheathing, and the maximum distance between purlins should be no more than 1000 mm with a 5 mm thick sheathing.
- Types of weather conditions: under low snow loads, spacing is typically 0.6 m.
- Spans of the purlins: Normally, the spacing of the purlins will be smaller than the span of the purlins to create a smaller uniformly distributed load along the length of the purlins, and the truss will endure a larger distributed load. Commonly, the span direction should be against the slope of the roof.
- Architectural considerations: Openings for windows, doors, and skylights should be considered when establishing purlin and girt spacing. Tertiary members can be added to frame openings if needed, but ideally, the primary purlin and girt members can also act as trimming members at openings.
2. Assume the depth and width of the cross-section:
- Apply the rule of thumb to estimate the depth of the purlins (the number could be rounded up) by depth = span/32
- Choose the available cross-section from the manufacturer's specifications with a suitable depth and design purpose:
- C - section purlins are used in simple, non-continuous spans.
- Z - section purlins are used in continuous lines of purlins for lapping at internal supports.
- The manufacturer’s products should specify material properties like material density and other information essential for design checks.
💡 Note: the orientation of purlins should provide a shorter distance from the shear center to the loading vector to minimize torsional impacts.
Calculate Characteristic Loads
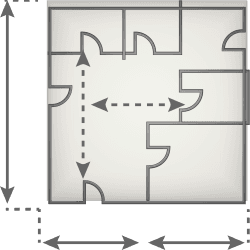
- Generally, loads in buildings are concentrated or uniformly distributed over an area. When designing purlins and calculating characteristic loads (i.e dead and live load components), you would need to consider the latter, as purlins would pick up different portions of the total load acting over the surface depending on their arrangement. Figure 4 shows a typical roof arrangement in a building and the highlighted regions show the effective area, also known as a loading strip, transferring the loads acting on the strip to the support beams.
- Determine the effective area of a span of the purlin. Effective area is taken as the product of tributary width and breadth. To simplify the design, Tributary width is simply taken as the distance between two adjacent members.
- Determine the dead load on the effective area in kPa (along the loading strip). Dead loads include the self-weight of building elements (i.e. the purlins themselves) and superimposed dead loads (i.e., cladding, tanking, insulation, plaster, finishes, services, etc.). To obtain the line load, you require element dimensions and density obtained in Step 2. Area load (kPa or kN/m2) is calculated as:
- Calculate the uniformly distributed dead load in kN/m along the length of the purlin or the line load:
- Calculate the uniformly distributed live load in kN/m along the length of the purlin:
- Purlins are typically inclined at an angle that follows the roof's slope. Therefore, there is a tangential and normal component to the applied dead and live loads. These loads can be transferred to the local member axis direction using the roof slope/pitch. Wind loads are always taken as normal to the rafter and should be added to the normal component of the applied characteristic loads without conversion.
The x-axis of the local coordinate is parallel to the rafter. The y-axis of the local coordinate is perpendicular to the rafter. The process of transferring loads to local coordinates is illustrated in Figure 5:
💡Note: Do not add dead load and live load together when projecting them on the x and y axis because the load factor in the load combination will change it.
If the design check is not satisfied, the sections' area must be increased or decreased.
4. Determine wind load and other load acting on purlins
Wind load is directly normal to the roof, which is on the y-axis of the local coordinate, so there is no need to convert it. Different design codes specify different approaches to calculating wind load on roofs. Wind load depends heavily on the region the structure is located in, the type of structure, and topographic factors.
The Design Codes that guide the wind load calculation are:
- Philippines Standard: NSCP Section 207
- European Standard: Eurocode 1 Part 1 - 4
- Australian Standard: AS1170.2
- US Standard: ASCE 7 - 10
The result will propose different wind load magnitudes (in kPa) on different locations on the roof, engineers usually choose the most significant wind load to design all purlins.
Calculate the uniformly distributed live load in kN/m along the purlin length by taking wind load on the effective area x spacing of purlins. The same steps could be repeated if there are any other environmental loads. Calculating wind loads on pitched roofs is a detailed affair, so we’ve written a separate article here that details the process.
Each Design Code will propose a different methodology to calculate the load combinations with different design factors. Due to the design factor, more loads on the structure don’t mean it will be the critical condition, so all load combinations should be checked and the most critical condition chosen. Here are some common combinations:
- Dead Load only
- Dead Load + Live Load
- Dead Load + Wind Load
- Dead Load + Wind Load + Live Load
Design Codes for load combinations:
- Australian Standard: AS1170.0
- European Standard: Eurocode 2
- US Code: ASCE 7 - 16
Choose the most critical scenario among those combinations to model and analyze the purlins. If the purlin system is simple enough, hand calculations can be performed.
Usually, bending is the deciding design factor for purlins; that is why it is commonly checked first.
- For each loading combination chosen from Step 5, determine bending forces for bending along the X and Y axes. For bending along the X-axis, evaluate bending moment using normal loads (Wn), and for bending along the Y-axis, evaluate using tangential loads (Wt).
- For a simply supported beam, the bending moment is calculated as M = wL2/8. Figure 7 illustrates some common beam configurations and the corresponding bending moment formula. Verify that bending moments are less than allowable or resistance stress limits.
❗If not verified, increase the section size and recalculate
The bending and axial loading combination is the second deciding factor for purlins. This occurs when a beam is subjected to loading that causes bending in both the major and minor axes. To verify combined loading refer to appropriate sections within steel or timber design Codes -
- AS4100-Clause 5 - Steel & AS1720-Clause 2 - Timber (Australian Code)
- AISC360-10 - Steel & ASCE7-22 - Timber (US Code)
- BS5950- Steel & BS5268 - Timber (UK Code)
❗If not verified, increase the width or height of the beam and recalculate.
The shear stress in the most critical section of the cross-section can be calculated using the maximum shear force.
Shear stress for beams can be calculated using:
τ = shear stress (N/m2)
V = total shear force at the point of location (N.m)
Q = first moment of area (mm3)
I = moment of inertia of entire cross-section (m4)
t = material thickness perpendicular to shear (m)
Verify that shear stresses are less than the resistance/allowable stress of material cross-section by referring to the appropriate design codes for timber or steel member design
❗If not verified, increase the width or height of the beam and recalculate.
9. Verify the beam for instantaneous and final deflection criteria.
Deflections include:
- Instantaneous deflection: It can be calculated with the load from the characteristic load combinations found in Step 5. Standard beam deflection formulas for common support types and loading conditions are shown in Figure 8.
- Calculate the final deflection by adding instantaneous deflection and creep deflection
- Creep deflection depends on the stiffness value of materials, using the instantaneous deflection and the specification of Design Codes to calculate. The formula for creep deflection will depend on which local Design Code you consult.
- Check the deflection by ensuring the allowable deflection is larger than the final deflection. Both the x and y axes need to be checked.
- A secondary structural component like purlins will usually have the allowable deflection of L/180 (Eurocode). Different Design Codes might specify different allowable deflections.
❗If not verified, increase the width or height of the beam and recalculate.
💡 Note: consider sag rods (or struts) for purlins and girts.
While cold-formed sections (particularly Z purlins or girts) can provide substantial material and cost savings due to their higher strength-to-weight ratios, it gives rise to conditions that may see these members deform under many loading conditions and fail by yielding or local buckling as a result of induced stresses. Sag rods (struts) may be added as lateral supports to provide alignment and reduce their tendency to twist and bend and allow the transfer of the lateral loads. Typical sag rods are 10-12mm in diameter. Generally, manufacturer’s tables will provide details on the application and installation of a bridging system such as sag rods.
10. If all those checks are verified, you have safe and suitable beam dimensions.
Related content
CalcTree
📚 References
- [1] Metroll. (2019). Metroll Standard Purlins and Girts. Design Manuals and Capacity Tables.
- [2] Technical Civil. (2018). Design of purlin example.
Check out our library of engineering tools here!